What is the Video Marquee widget?
The Video Marquee widget is a powerful and dynamic tool for displaying a collection of videos in a continuously scrolling loop. This widget allows you to create an eye-catching video banner that automatically plays a series of videos from platforms like YouTube and Vimeo. It’s a perfect solution for showcasing video testimonials, product demonstrations, or a portfolio of work in a visually engaging and modern format.
Common use case
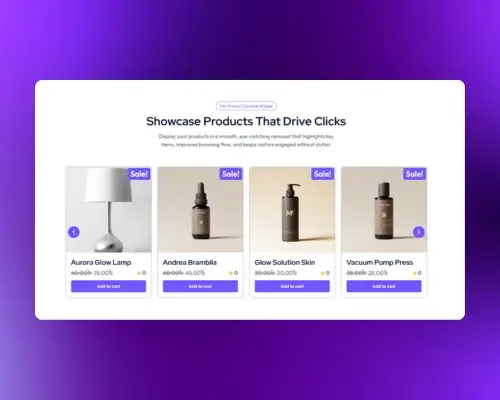
A common use case for the Video Marquee widget is to create an engaging portfolio section on a website’s homepage. By displaying a continuously scrolling banner of short video clips, a company can immediately capture a visitor’s attention and showcase their expertise. This provides a quick, dynamic overview of their work without requiring the user to navigate to a separate page or click through a traditional gallery.
Additional use cases
- Video Testimonials: Showcase a continuous loop of customer video reviews.
- Educational Content: Display snippets of tutorial or course videos on a learning platform.
- Event Highlights: Create a dynamic marquee of key moments from a recent conference or event.
- Vlog Series: Highlight the latest videos from a YouTube or Vimeo channel.
Requirements
- You need the Marquee Addons plugin (Free) installed and activated on your website.
- You can find detailed installation instructions in our dedicated installation blog post.
- Make sure that this addon is enabled so you can find it in the Elementor editor.
- Marquee Addons works only with the Elementor Page Builder plugin, so you will need to have it installed and activated as well.
Add the widget
To add the powerful Video Marquee widget to your Elementor-powered website, follow these simple steps:
- Navigate to the Elementor editor.
- Search for the Video Marquee widget.
- Drag the widget to your desired location on the page.
- Configure the widget’s settings in the left-hand panel.
- Update the page to save your changes.

Video
See a video demonstrating the widget in action.
Settings for the Video Marquee widget
The Video Marquee widget offers extensive customization options categorized into three main tabs: Content, Style, and Advanced.
Content tab
Videos:
- Video List: Use this repeater field to add and manage the individual videos in your marquee. A note suggests keeping the video list under 5 items for best performance.
- Source: Select the video source, either YouTube or Vimeo.
- Link: Paste the URL of your video.
- Start Time/End Time: Specify a start and end time (in seconds) to play only a specific segment of the video.

Video Options:
- Autoplay: Toggle to enable or disable autoplay. Note: Autoplay is affected by Google’s Autoplay policy on Chrome browsers.
- Mute: Toggle to mute the video.
- Loop: Toggle to make the video loop continuously.
- Player Controls: Toggle to show or hide the video player controls.
- Modest Branding: Toggle to hide YouTube’s player branding.
- Privacy Mode: Enable this for enhanced privacy on YouTube/Vimeo.
- Lazy Load: Enable this to improve page load speed.
- Suggested Videos: Choose what to display after the video finishes (e.g., videos from the same channel).
- Image Overlay: Toggle to enable or disable a custom image overlay for your videos.
- Choose Image: If the image overlay is enabled, you can upload a custom image to use as the overlay.

Image Overlay:
- Image Overlay: Toggle to enable or disable a custom image overlay for your videos.
- Choose Image: If the image overlay is enabled, you can upload a custom image to use as the overlay.
- Play Icon: Toggle to show or hide a play icon on the video overlay.
- Icon: Choose an icon to use for the play button.

Gap:
- Gap: Space between the video marquees.

Marquee Options:
- Show Vertical: Enable this for vertical scrolling instead of horizontal.
- Reverse: Change the direction of the animation.
- Pause On Hover: When a user’s mouse hovers over the widget, the animation will stop.
- Animation Speed: Control the speed of the scrolling animation.
- Show Edge Shadow: Toggle this to add a subtle shadow effect to the edges of the marquee.

Style tab
Videos:
- Aspect Ratio: Choose the aspect ratio for your videos (e.g., 16:9).
- Gap: Adjust the spacing between each video in the marquee.
- CSS Filters: Apply CSS filters to the videos (e.g., blur, brightness, contrast).
- Border Type: Add a border to the videos.
- Border Radius: Adjust the corner radius of the videos.

Play Icon:
- Color: Set the color of the play icon.
- Size: Adjust the size of the play icon.
- Box Shadow: Add a box shadow effect to the play icon.

Advanced tab
The Advanced tab provides a comprehensive set of controls that are common to most Elementor widgets, allowing for refined design and responsiveness. Here you can adjust the widget’s Layout (e.g., positioning, Z-index), apply engaging Motion Effects (like scrolling effects or entrance animations), customize its Background, add Borders and Box Shadows, apply Masks for unique shapes, control Responsive visibility across devices, add custom HTML Attributes, and inject Custom CSS for bespoke styling.

Frequently Asked Questions (FAQ)
How can I add a custom image overlay on my videos?
In the Image Overlay section, enable the Image Overlay option and upload a custom image. You can also toggle the Play Icon to add a play button on the overlay.
Can I control the autoplay feature for videos?
Yes, you can enable Autoplay in the Video Options section. However, note that autoplay is subject to Google’s autoplay policy on Chrome browsers.
Can I adjust the speed of the video scroll?
Yes, in the Marquee Options section, you can control the Animation Speed to adjust how quickly the videos scroll.